Repair Guide :.
Pump Handle Reinforcement - The Manly Way!
Disclaimer: The following repair guide is provided for informational purposes. Not all these repairs have actually been tested here. iSoaker.com and its affiliates cannot and will not take any responsibility to any damages caused as a direct or indirect result of anything attempted. Use at your own risk/discretion.
Repair Description by The Legacy | Posted: 20080616
Note: this guide can also be used to repair a broken plastic handle; just some minor tweaking to the guide and you'll be good to go.
Recently, I planned (and eventually hosted) a big waterfight, and I decided to include my two CPS weapons: A CPS 3200 and a CPS 1200. The 1200, among the rest of the non-track handled designs and my recently EBay'd CPS 1000, are prone to snapping due to their hollow, plastic design.
Fear not, here I have a retrofitting guide for these guns, which will hopefully clear a ton of the stigma that is related to them.
For the 'Backyard Wars' I set up, I decided to retrofit the 1200 to reinforce the flimsy handle.

To start, you need to take out the screws to the gun in question - a fairly easy task - then (CAREFULLY!) pop off the orange plastic cap on the end. Also, watch out for glue; it can be a royal pain. Pry, or use a very fine dremel bit to detatch the two sides. Avoid extensive damage to the blaster; a very firm, yet very delicate hand is required. Also, removing the plastic handle (as shown) should be left on until the unit is removed from the gun; makes it easier to pull out.
One problem is that the nose of the gun would require extensive damage in order to completely seperate the two halves, so in order to not do so, I suggest just prying the lower half (with all off the screws removed of course), so you can remove the pump handle.

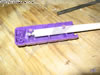
Once removed, your handle should look something like this. Although they are of different lengths and have different hole spots and sizes, as well as different thicknesses, they are all essentially the same design. This is a 3200 handle, but the 1200 and the 1000's handle looks very similar, for example:

Also...

Don't ask me why they made these things hollow. The 1000's handle is actually worse, but all that I've seen have hollow cores. Also, which is possibly even MORE absurd, is that the handles have two screws and two connecting 'axles', the pump tube only goes through ONE of them. It's a major design flaw, and the pictures I've seen seem to highlight that as a breaking spot.
Anyway, it's time to go check out measurements. Because this is a generic repair guide, I won't be giving you measurements. The reason is because each gun is different, and if you use the wrong measurements, you could total your gun! Always check, like I did, and everything will be dandy.
CAUTION:
Try to prevent the rubber from the end of the pump rod from getting contaminated by dust, dirt, and make sure it doesn't get cut. Watch it off once everything's all done and dandy.
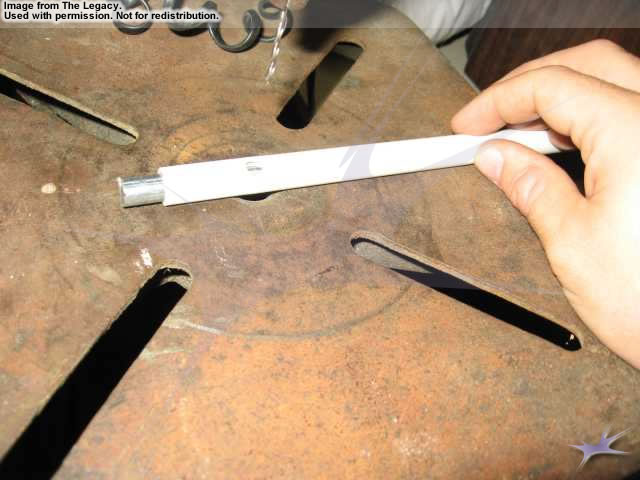
To check a measurement, I checked out some spare wooden doweling and slid them through the middle; you don't want to replace the ENTIRE plastic; you just want to reinforce it.
After, I cut it to size.
But...wait a second! I said the manly way, right? Well, it's time for a trip to your local hardware store. Of course, bring your handle.
At the store, go to the metal doweling department, and find a doweling that fits not the width of the tube, but the inside of it. Don't figure out lengths yet; as long as it's not absurdly long, having excess isn't a bad thing.
Anyway, back to the household.
You should now have your doweling. You can measure to see where it measures up to your pump handle. It should measure up so that way inside, it should reach the end like this:
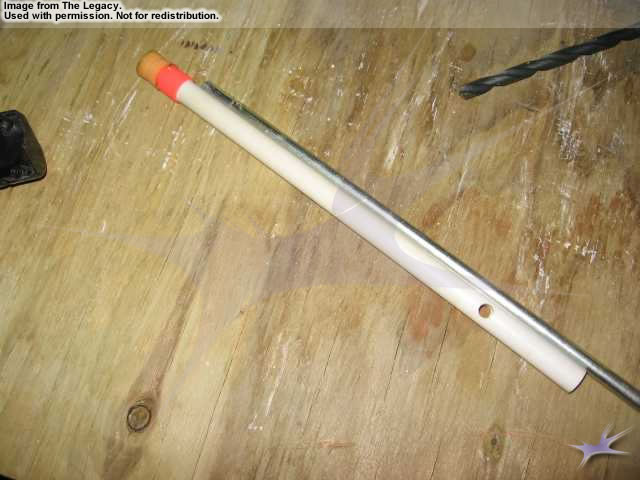
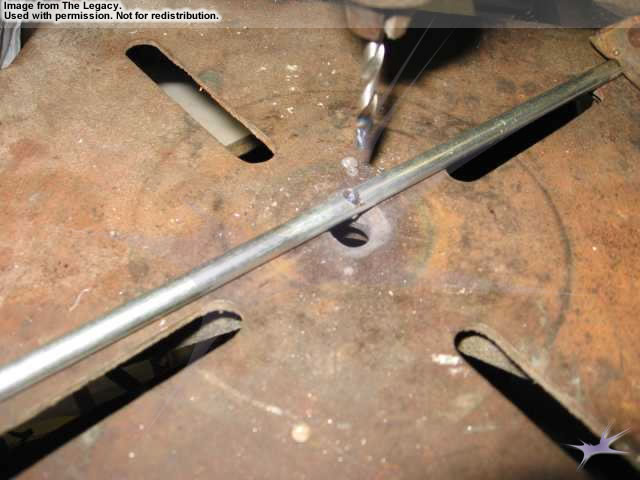
In most, this shouldn't be an issue, but uh oh! In the newer guns, they inexplicably added some "Mystery Larami Material" (I think it's cork) part way inside the gun, keeping it going from further than this point in the 1200's case:
You may think "YAY! Make it shorter!" but that will only cause trouble (not to mention create a very conveinient breaking point. The only thing you can do here, is to buy (or use) a very long metal drill bit (like those found on this site: http://www.absolutehome.com/home/1/index380.html) that has a thread long enough to reach near the end of the tube.
CAUTION:
Carelessness here will destroy the tube!
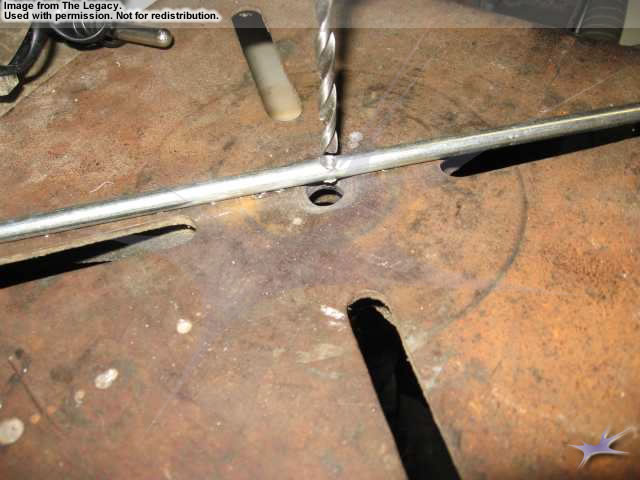
To drill down, use firm pressure using a hand drill (with the long bit) on the tube, and drill down to a measured point on the bit itself (mark it with a pen) so you don't drill past the end. You want to cut it to about 5cm away from the orange cap end. Also, press firmly, on and off, make sure that the shavings get out, and make sure the bit doesn't overheat; if it does, it will ruin both the bit and the tube!

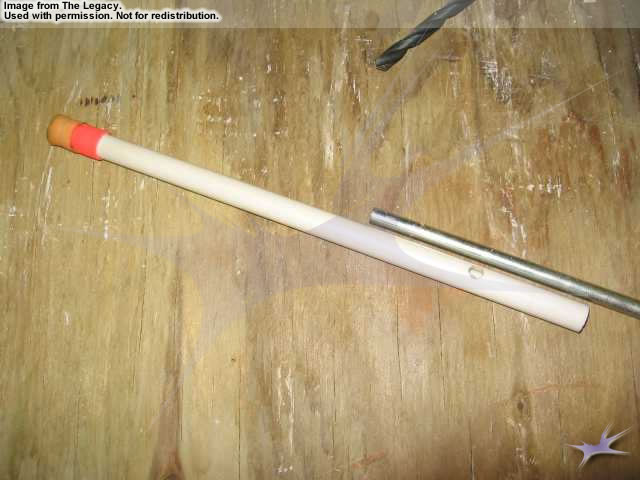
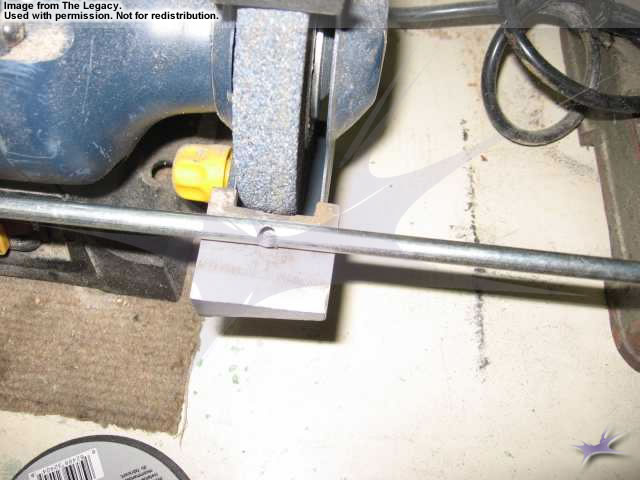
Once this is done, it should slide in all the way. From here, put the rod in as far as it will go so that it goes in snug. Where you cut it is depending on the pole; make sure that there is excess. Cut it with a handheld bandsaw like this:

...And it should be cut to be this length (in this case):
...Then grind it down flat (without grinding off too much!):
Why longer? You'll understand later, but make sure it's long enough to go past the plastic, and before the end of the handle itself. Also, you can always trim it AFTER you're done drilling, but I find it easier to handle if you cut it first; but if you mess up the drilling, you'll lose more doweling that way.
From here, you get to the really bothersome painstaking part: drilling through the center of the dowel. This requires a firm hand; a vice may help here for those without one, and a drillpress is pretty much mandatory.
DANGER:
Make sure you wear eye protection!
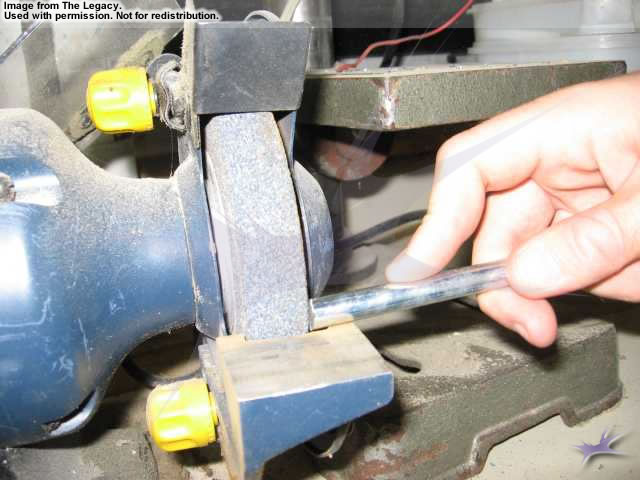
To start, use a quite small drillbit that is pushed well into the drillpress for sturdyness.
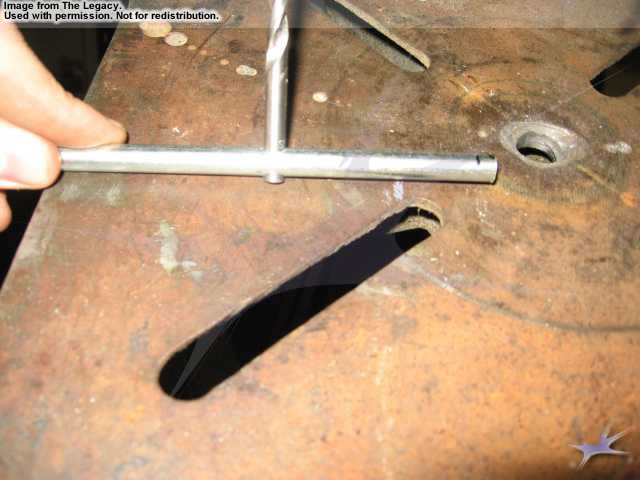
To start the hole, make sure that you use the original tube to find where the hole should be drilled (dead center of the spot that would connect the tube to the handle). Once you make your pilot hole, take off the tube, and drill as dead center as possible; if you're inaccurate, pull out and try again. If it's too mutulated, cut a new doweling.
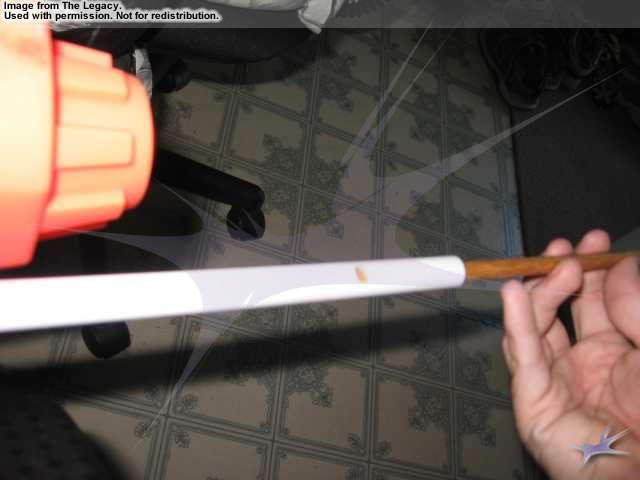
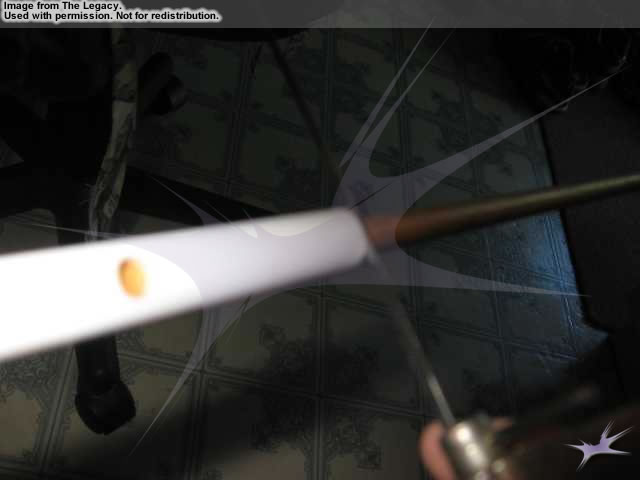
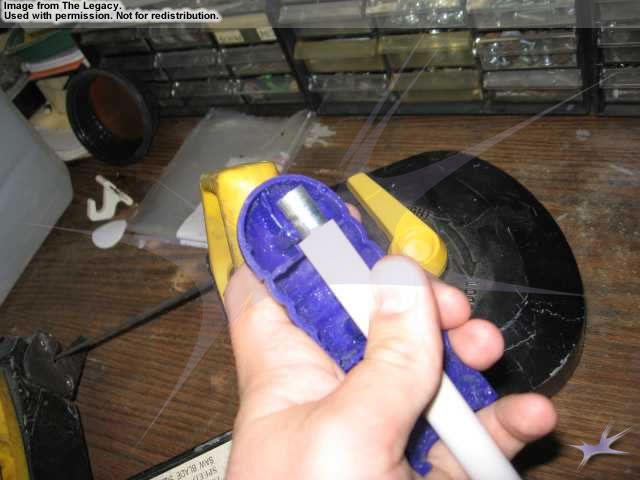
One thing to note; make sure you dip your drillbits with cutting oil; if you don't, you'll burn them up like this:
Once you cut an accurate hole straight through, check with the tail end of your drillbits to see what the size of the handle hole is; you don't want to drill it any bigger or smaller, or you'll risk the integrity of the job.
From there, start drilling with progressively larger drillbits until you reach the maximum that you figured out.
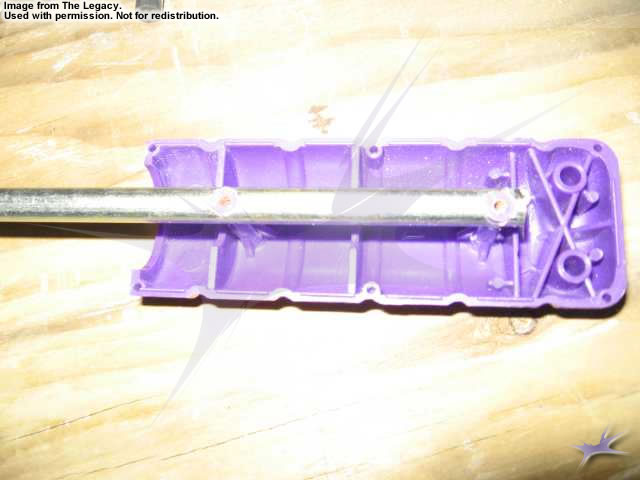
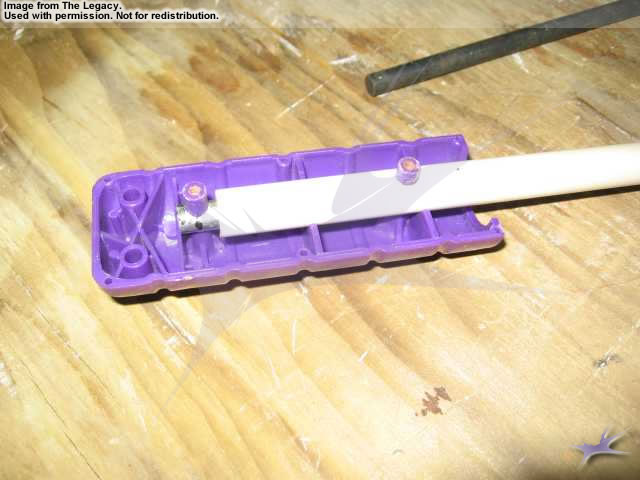
Once this is done, check the hole by inserting it into the tube, then into half of the handle; it should fit snug:
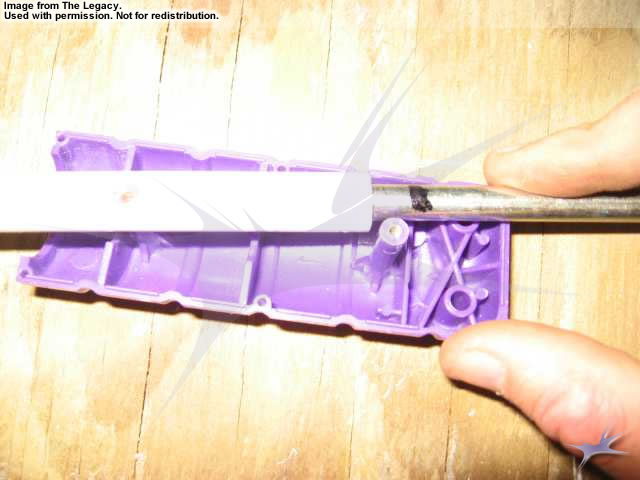
If it's snug, then you did it right. You shouldn't need to force it. If you do, you're small one size. Also, make sure you check both handle halves; they may behave differently in the hole.
From here, remember that excess I told you to cut? That's right, I want you to cut a hole into the extension: double the strength!
Again, accuracy is key, and in addition, you'll want to use one of the maximum drillbits as a guide to straight up. Make it level and aligned to the press.
After you're finished drilling the holes, check the holes again:
...Then carefully grind around the holes; this will make it easier to slide it into the tube:
Then, slide the dowel into the tube, then into the handle. Should be perfect:
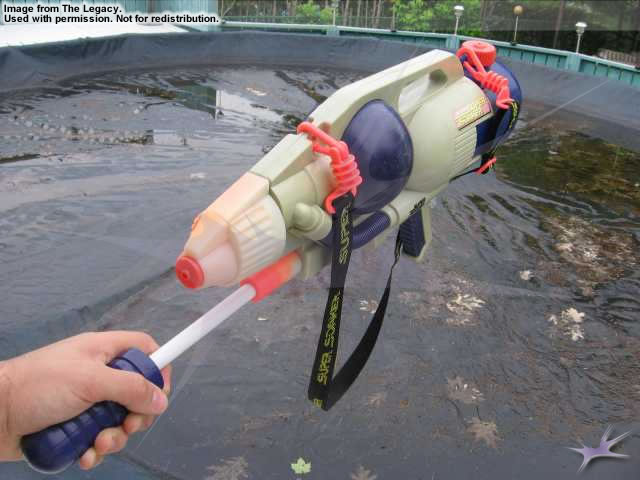
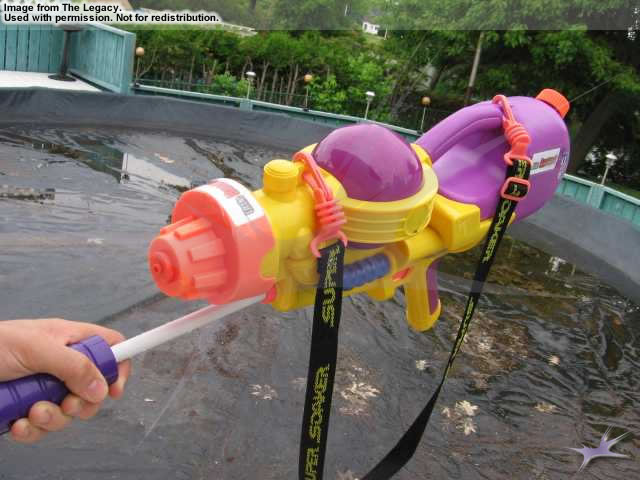
CPS 1000:

CPS 1200:
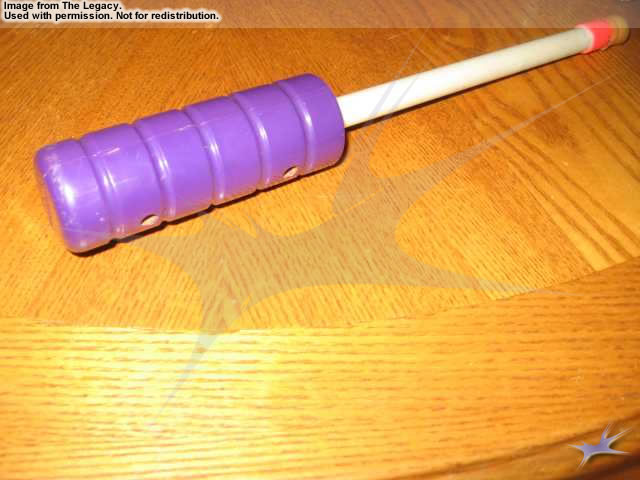
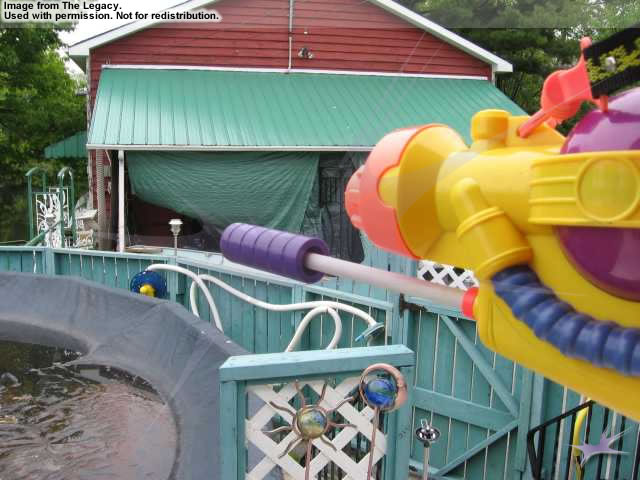
Finished, it should look something like this:
Now, a pointer; I suggest you don't glue the metal rod into the handle; if, heaven forbid, the plastic breaks or the rod gets bent, then you'll need to be able to slide it out.
From here, put it back in:
...And you should be good to go:
CPS 1000:

CPS 1200:
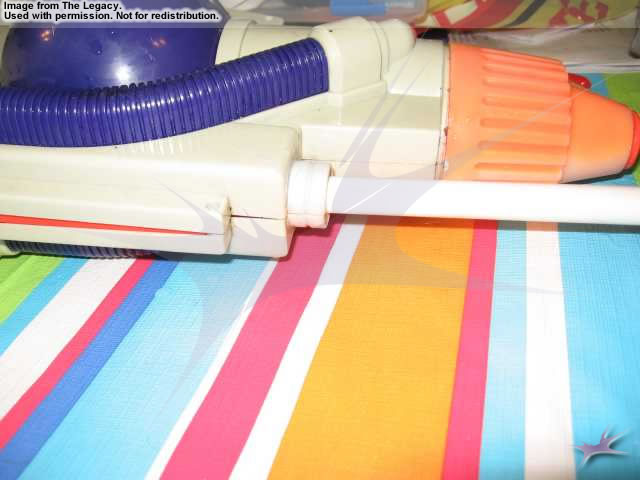
Test:
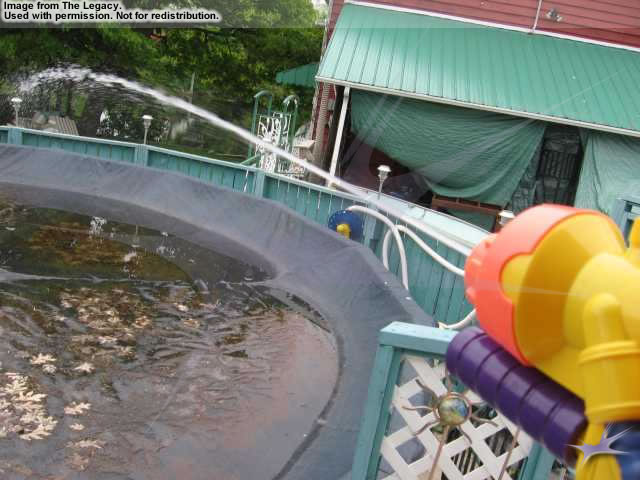
...and if it works, you're done! :)
Unfortunately, no one will ever know that you've done this mod (unless you unscrew the handle). The only way people will know is if you pull off this stunt while empty (if you do it while loaded, you may break the case!):