
Repair Guide :.
Water Warriors Orca Lever
Disclaimer: The following repair guide is provided for informational purposes. Not all these repairs have actually been tested here. iSoaker.com and its affiliates cannot and will not take any responsibility to any damages caused as a direct or indirect result of anything attempted. Use at your own risk/discretion.
By: iSoaker.com | Posted: 20100527
The Problem: During a free-for-all battle engaged with some colleagues at work, my Water Warriors Orca began to leak from the nozzle; the nozzle valve failing to completely close. At the end of the water war session, I opted to pump up the Orca to drain the pressure chamber of its remaining water and pressure. Upon pulling the trigger, it suddenly jolted with a snapping sound coming from the front of the blaster. The trigger lost all resistance, apparently no longer attached to the internal nozzle valve mechanism properly. The nozzle was stuck partly open, but at least the pressure chambers could be drained by continuing to pump, pushing out the remaining water. After returning home, I opened up my Orca to determine what had gone wrong.
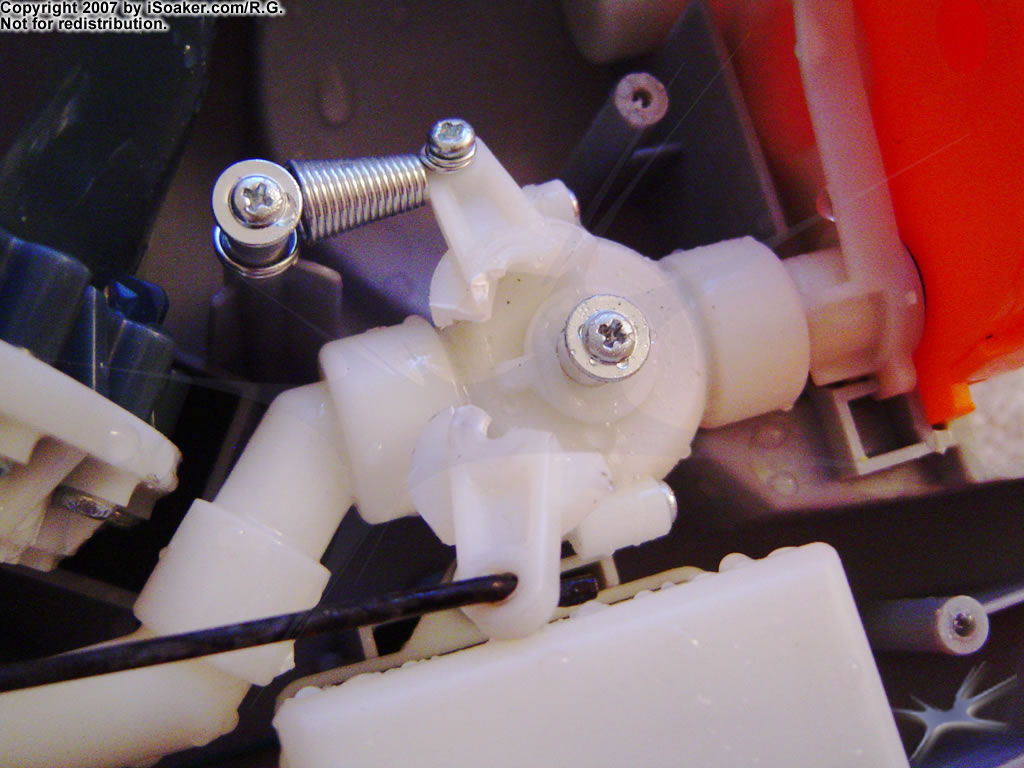
After opening the Water Warriors Orca's casing, the trigger valve problem was readily apparent; the ball-valve's lever had split in two. What was unclear was the reason for the breaking in the first place.
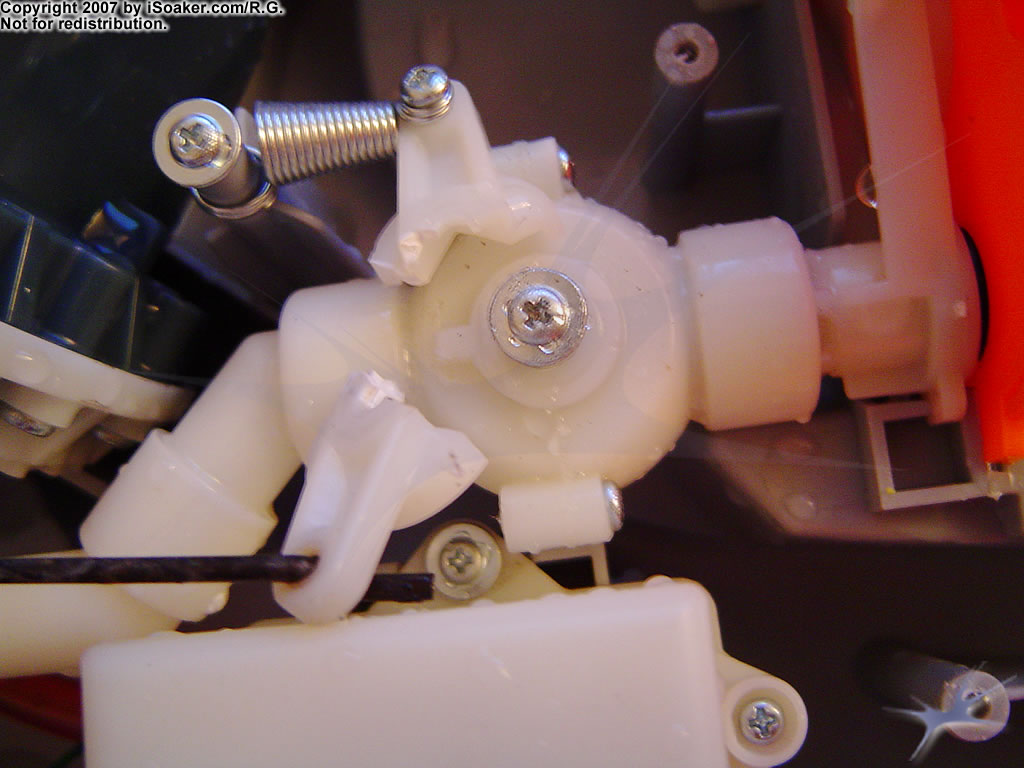
Upon closer inspection of the broken valve lever, it seems like part of the piece had a defect, cracking at the place this piece experiences the most amount of stress (i.e. the outside part of the pivot). Once the crack had formed, the remainder of the lever tore under the strain of the spring and force when the trigger was pulled. This lever is normally mounted via its square hole onto the square-shaped rod that controls the opening and closing of the nozzle's ball valve. The valve, itself, was rather stiff to turn which likely contributed to the breaking of this piece.
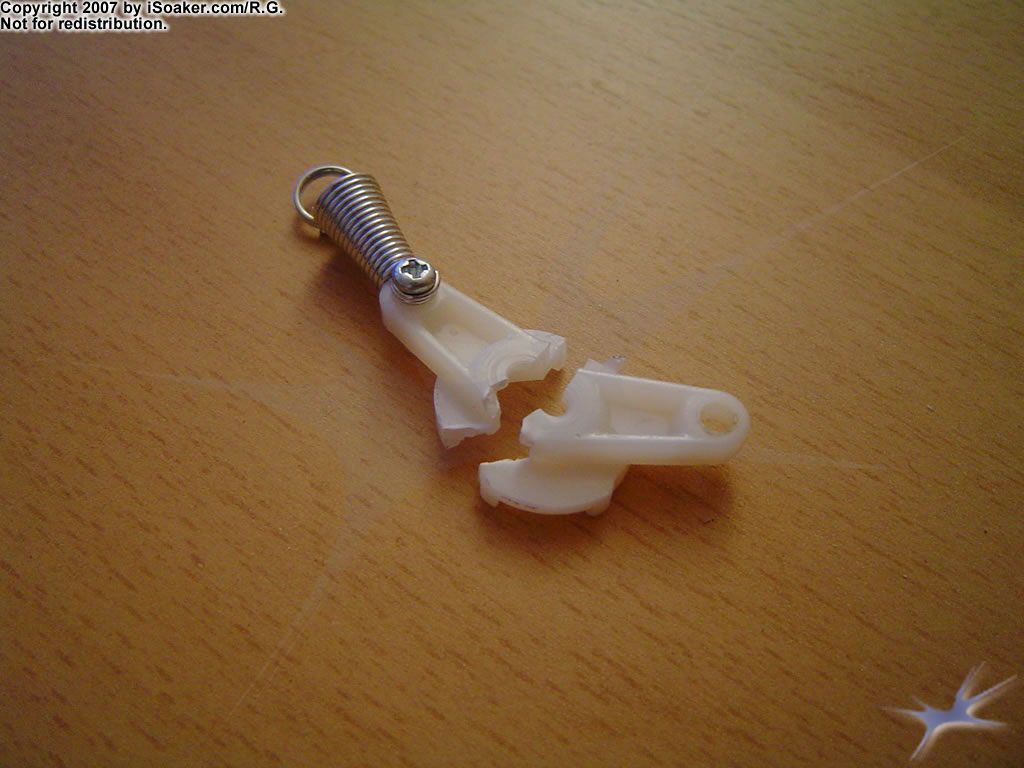
A couple of screws hold the valve lever in place. The lever was fully removed to facilitate repair.

My first attempt at repairing the lever involved using a couple of layers of epoxy to adhere the two pieces together. I had to ensure that the bottom face of the lever remained epoxy-free as this part was in direct contact with the rest of the valve assembly. As well, the top of the lever held down by the fastening screw had to be kept flat. While this appeared solid after drying overnight, epoxy, alone, proved unsuccessful at fixing the lever. Once the piece was reattached, a test pull of the trigger ripped it apart, peeling the epoxy away from the plastic. As such, a more ambitious repair was attempted.
Instead of simply attempting a different form of adhesive alone, I started by removing any lingering trace of the failed epoxy application, cleaned the contact points, then shaped wire from an unfolded paper clip to loop around the two pieces of the broken lever. The base section the wire is wrapped around has a notch to control motion of the lever, thus I had to be careful that the wire would not interfere with proper lever motion. Holding the wire in place around the two pieces, a pair of needle-nosed pliers were used to twist the wire, tightening it snugly about the valve lever. The longer extended piece was looped around one of the lever arms while the other extended short piece was removed to prevent it from potentially hitting the side of the blaster when the case was closed.
With the wire in place, the valve lever felt strong enough to reattach without fear of the two plastic pieces coming apart again. However, to ensure that the wire would not pop off, a layer of epoxy was carefully applied, gluing the wire to the plastic. After drying overnight, a second layer of plastic cement was added. Care was taken to ensure no glue would cover the screw holes or affect rotation of the lever when attached back on the valve.
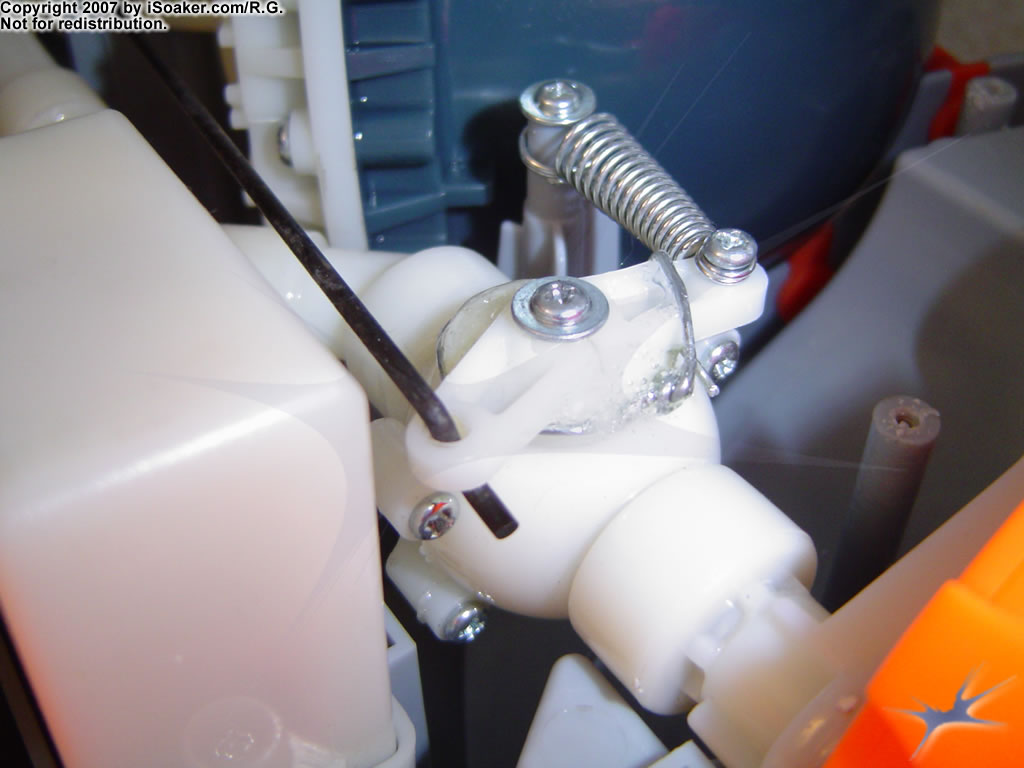
The pictures below show the repaired valve lever in place with the spring and trigger rod re-attached.
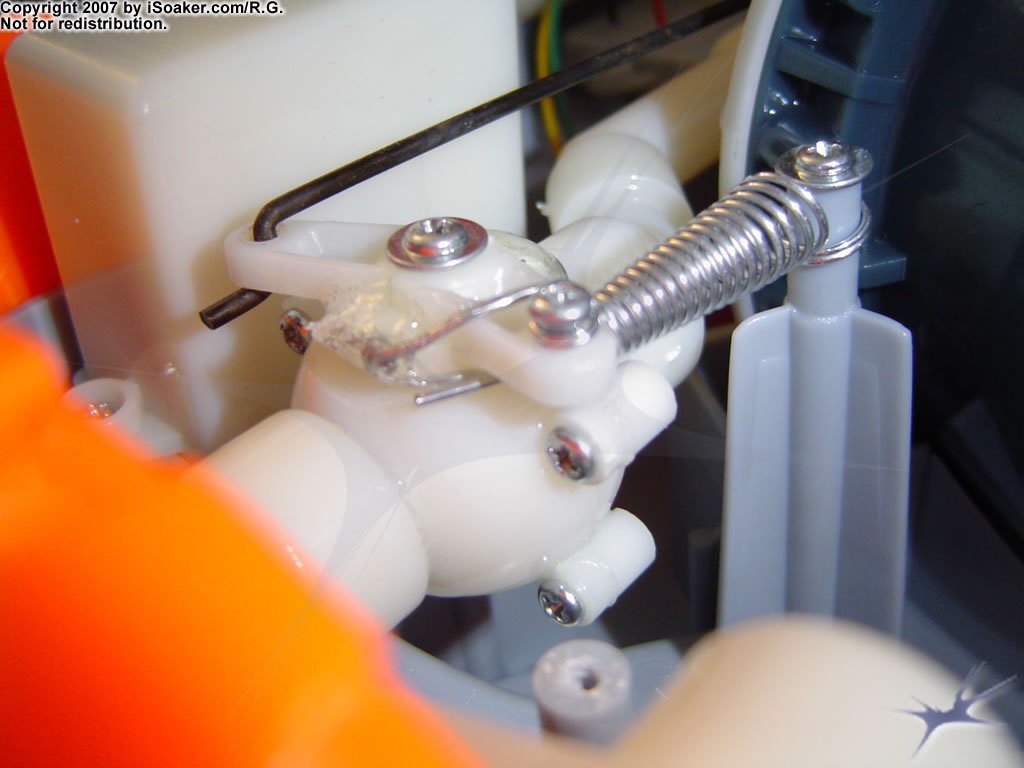
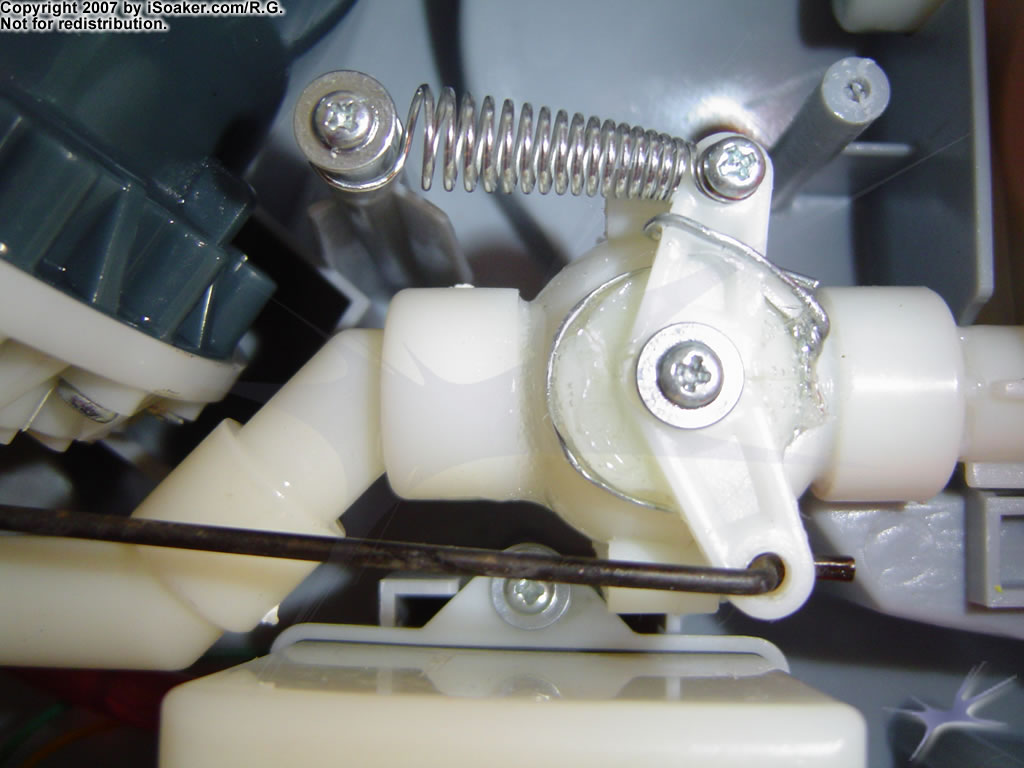
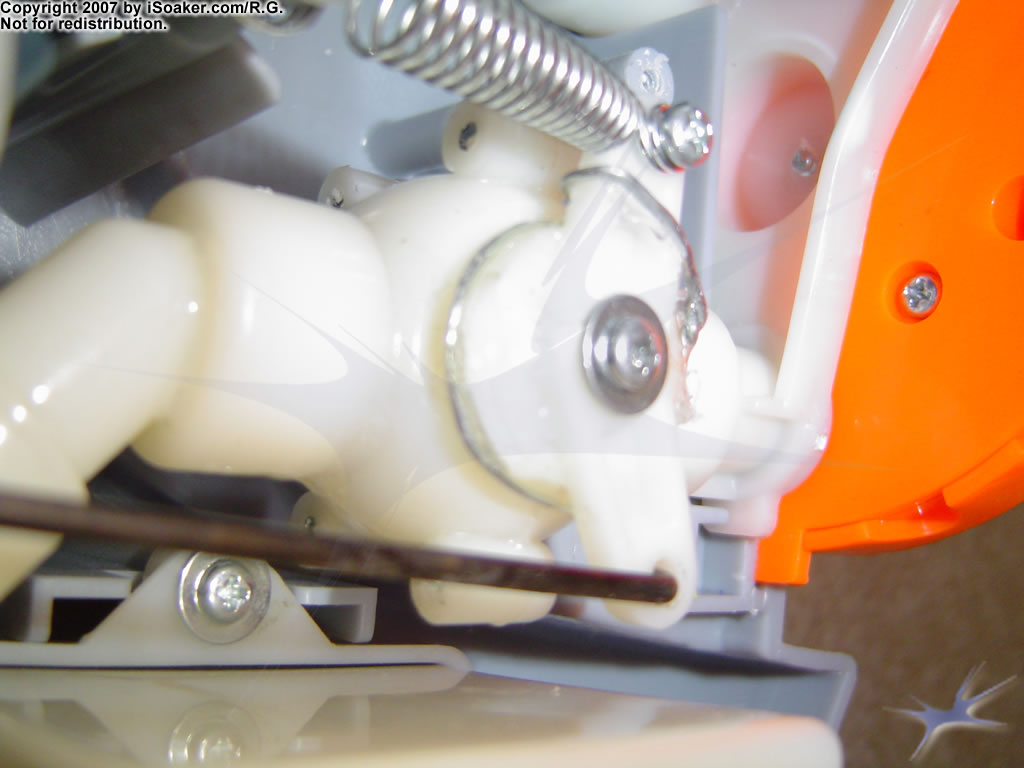
The question is, of course: does it work?
A few pulls of the trigger and all appears good again. The valve toggles once again properly between its opened and closed positions. I suspect part of the reason the lever failed in the first place is that there is no physical stop for the trigger to prevent a user from pulling too hard on the trigger valve. Combining over-zealous pulls with lack of a trigger stop likely results in excess amounts of stress on the valve lever, thus increasing its chance of breaking. Hopefully, this reinforced trigger lever will be able to withstand typical blaster use; so far it appears to be functioning quite well. Time will tell.